The “BOOSTER” ride is made up of one telescopic column hinged to the trailer, which is lifted to the vertical position and raised to the max. extension hydraulically. Two rotating arms are installed on the upper part of the column by means of a swinging bearing.


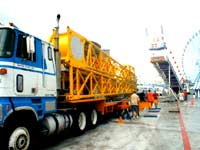
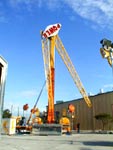
Step 1 - Parking of the truck

 As we reach the place we can easy base the attraction into the assigned area: to set up the ride we need a free space af 16 mt.
for 8.


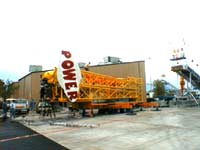
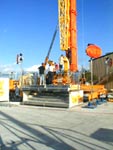
Step 2 - No city power for setup
 We have a small generator at ride's disposal so we can start to set up the attraction without using the urban electrical energy.
Before beginning to install the column, we check the good operation of all the lights positioned on the arms, the central sign and the good operation of the winch of the lift.
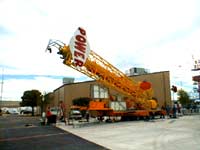
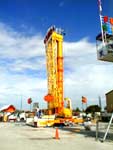
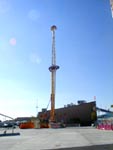
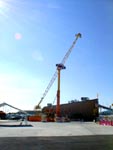
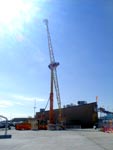
Step 3 - Column elevation
 Acting to the levers of the hydraulic distributor, we rise the colums, paying attention to the materials loaded on the semitrack.
While we rise up, the column allows our approach to the platform structure and we can build the footboard for the public, while the column is lifting.

 
Step 4 - Work for the platform
 When the column is perfect vertical, we put the bolts in and we can start to slip off the column upwards.
At the same time we finish the foodboard for the pubblic access and we set up the lights remaining.

Step 5 - The arms of the ride
 We open the arms making them rotating with the appropriate motors. When they are in the right position,
we activate another motor and we put the plugs in to block the arms without going up to the column. Now we can open the little hinged arms with an electrical winch.


Step 6 - The vehicles of the ride
 Rolling the vehicles through appropriate rails, we put them aligned with the arms. After acting to the levers of the hydraulic distributors, we activate the roller into the column and we let it going down till the flange of the arm is near to the flange of the vehicle. We block the vehicle to the arm, so we can do the same with the other vehicles.


Step 7 - Final check

 We check all safety devices
in order to open the ride to
the public.
Step 8 - It's time to enjoy 


Step 9 -   Take a Ride Video 


 Home  |  Technical Specification  |  Setup  |  Take a Ride  |  Photo Gallery  |  Business Purpose  |  Contacts 

Fabbri Group © 2002-2003